Talk to an Expert
We will help you get your DNA Spaces dashboard up and running in no time.
Tell us how we can assist you?
Please make sure you have covered all the prerequisites before you start the configuration.
In order to connect your wireless network with Cisco Spaces, you may have to open the ports 80 and 443 to establish connection between your wireless network and the Cisco Spaces. You can establish this connection through a public IP or proxy (use the cmxos sysproxy command)
The CMX on Premise must be publicly accessible for the following reasons:
To establish connection between the Cisco Spaces and your wireless network, you must whitelist Cisco Spaces IP addresses – 52.20.144.155
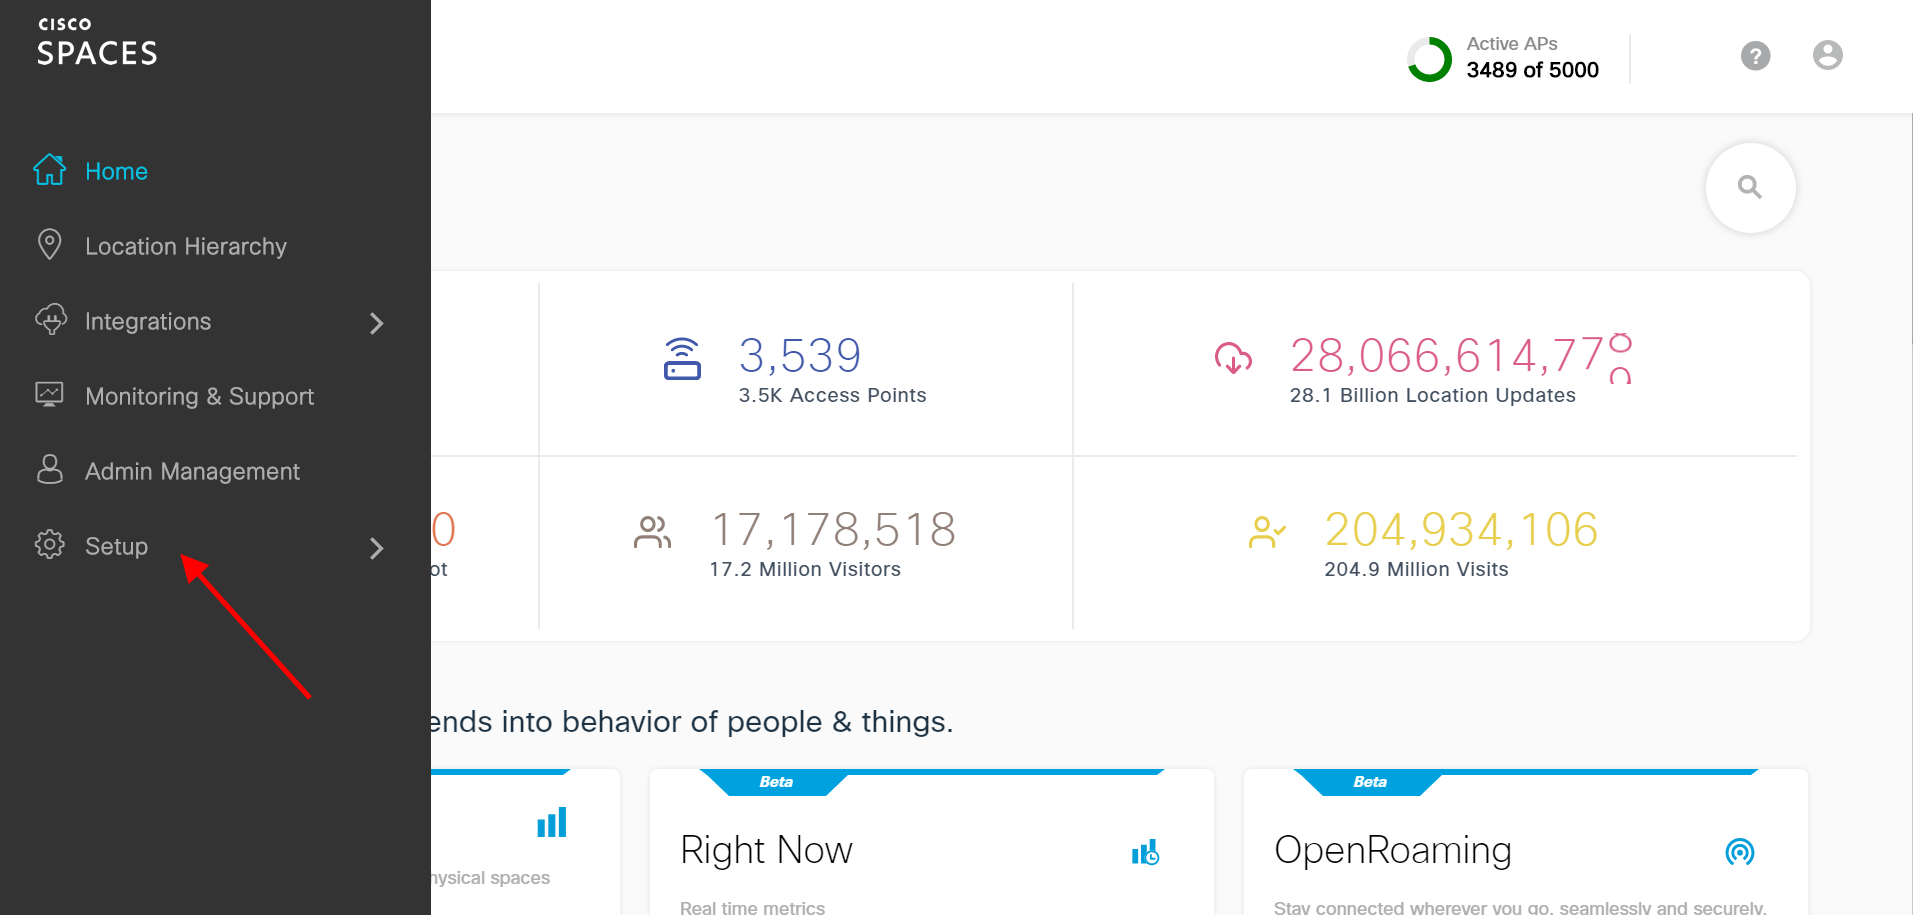
In the Cisco Spaces dashboard, click on Setup > Wireless Networks on the left navigation
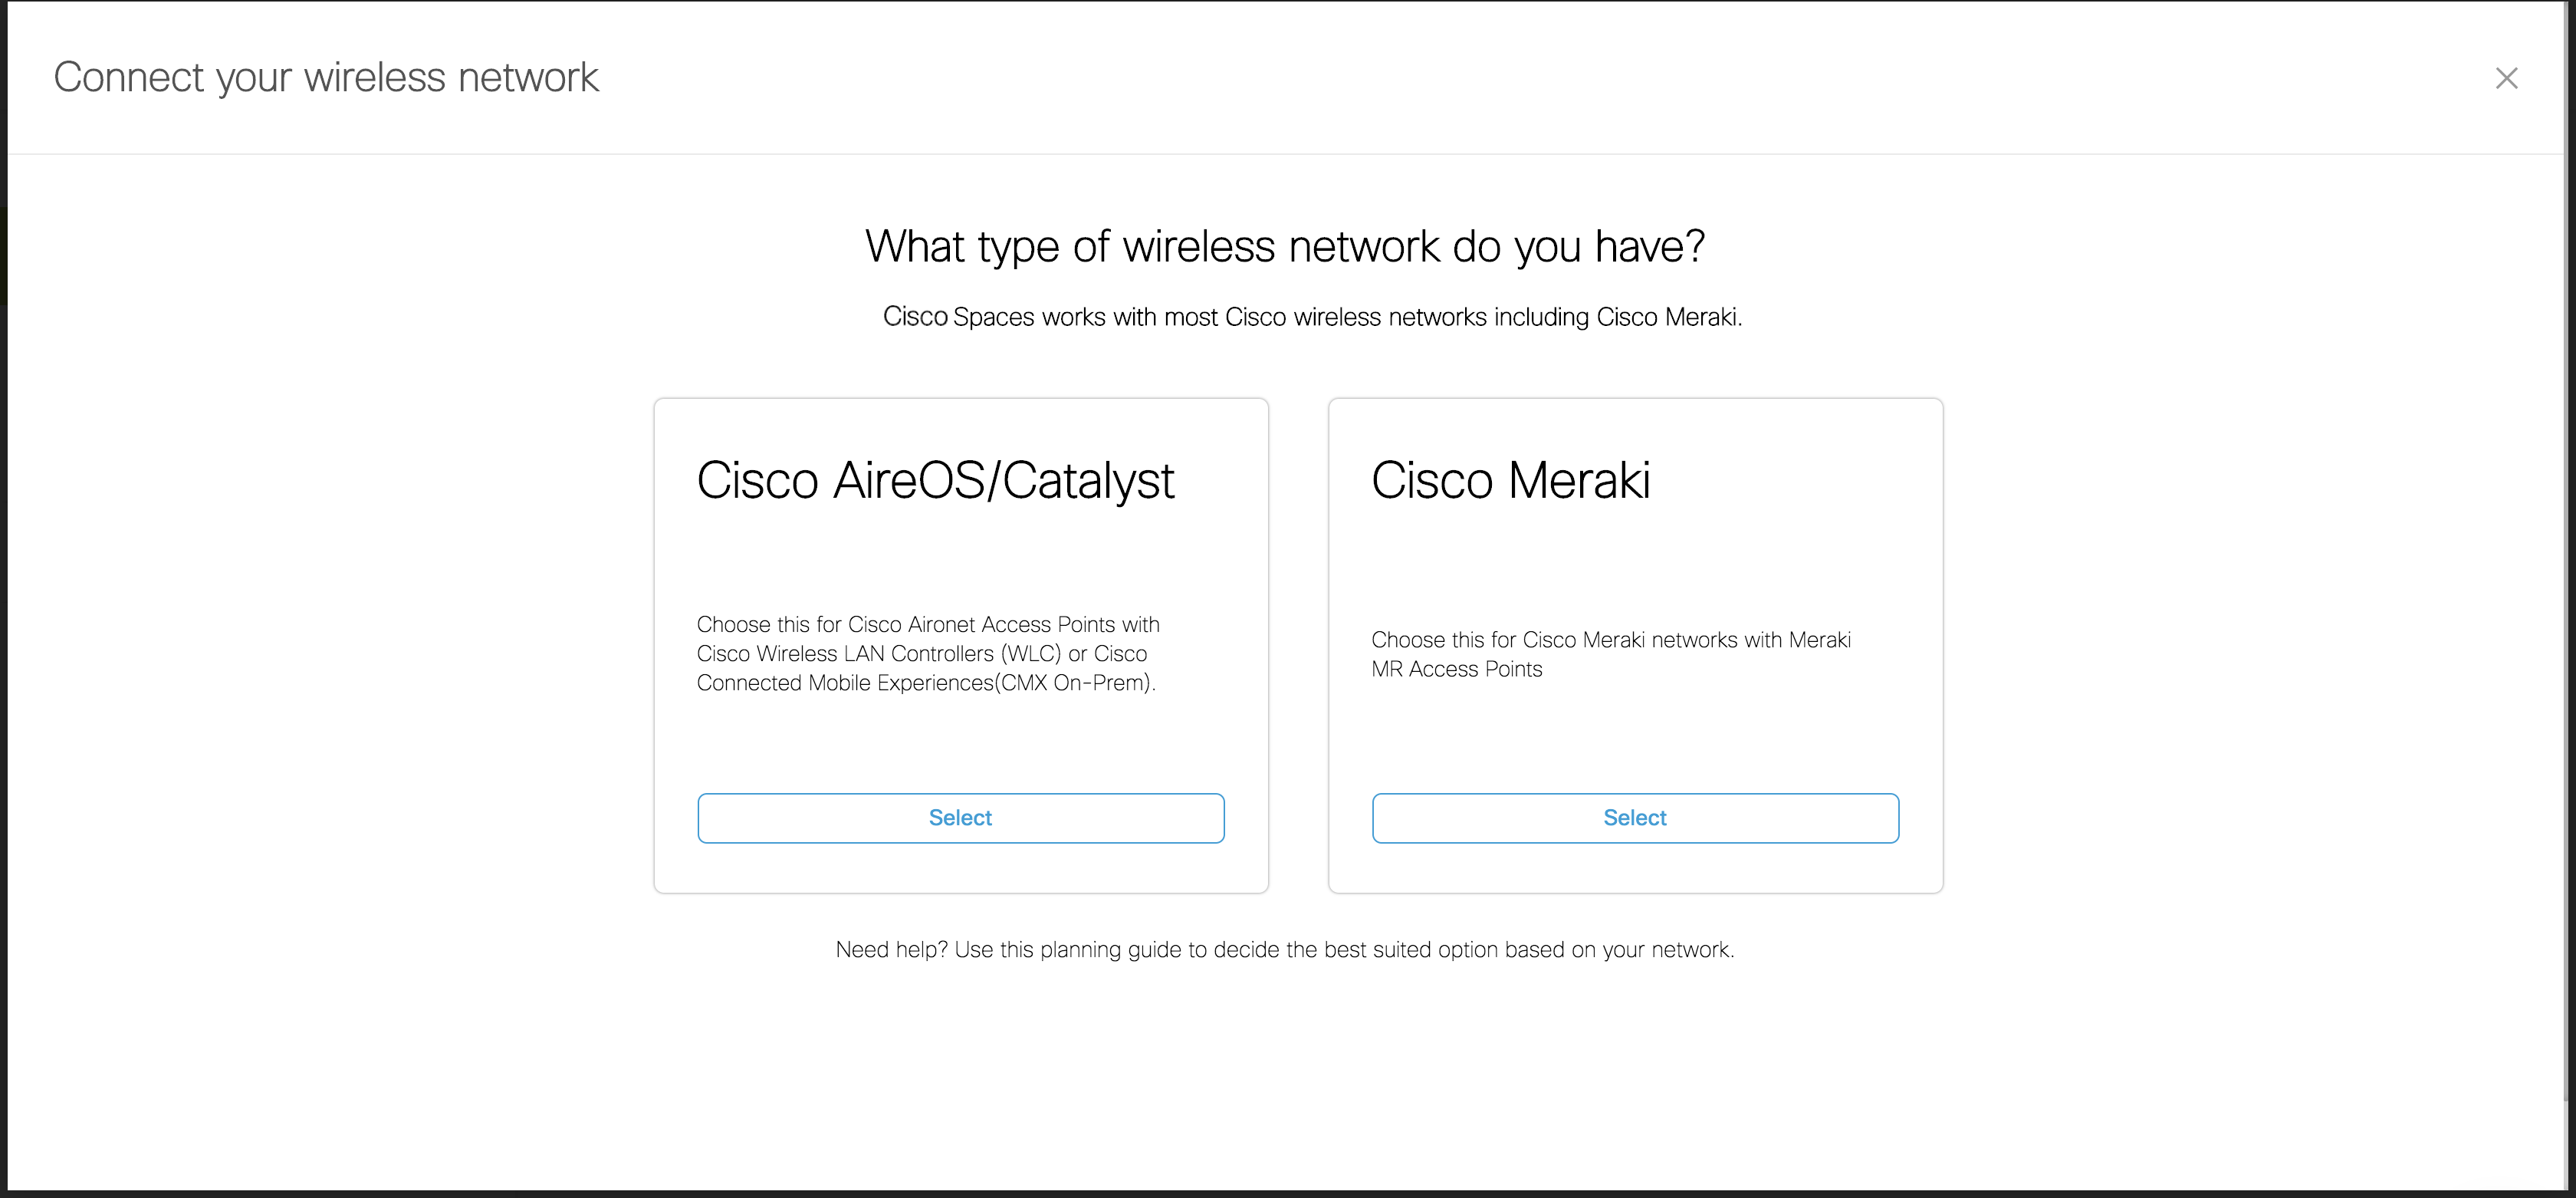
Click on “Get Started” button and Select “Cisco AirOS/Catalyst”
Select “Via CMX On-Prem” then Select “CMX 10.6 and Later” and then click on “Customize Setup” 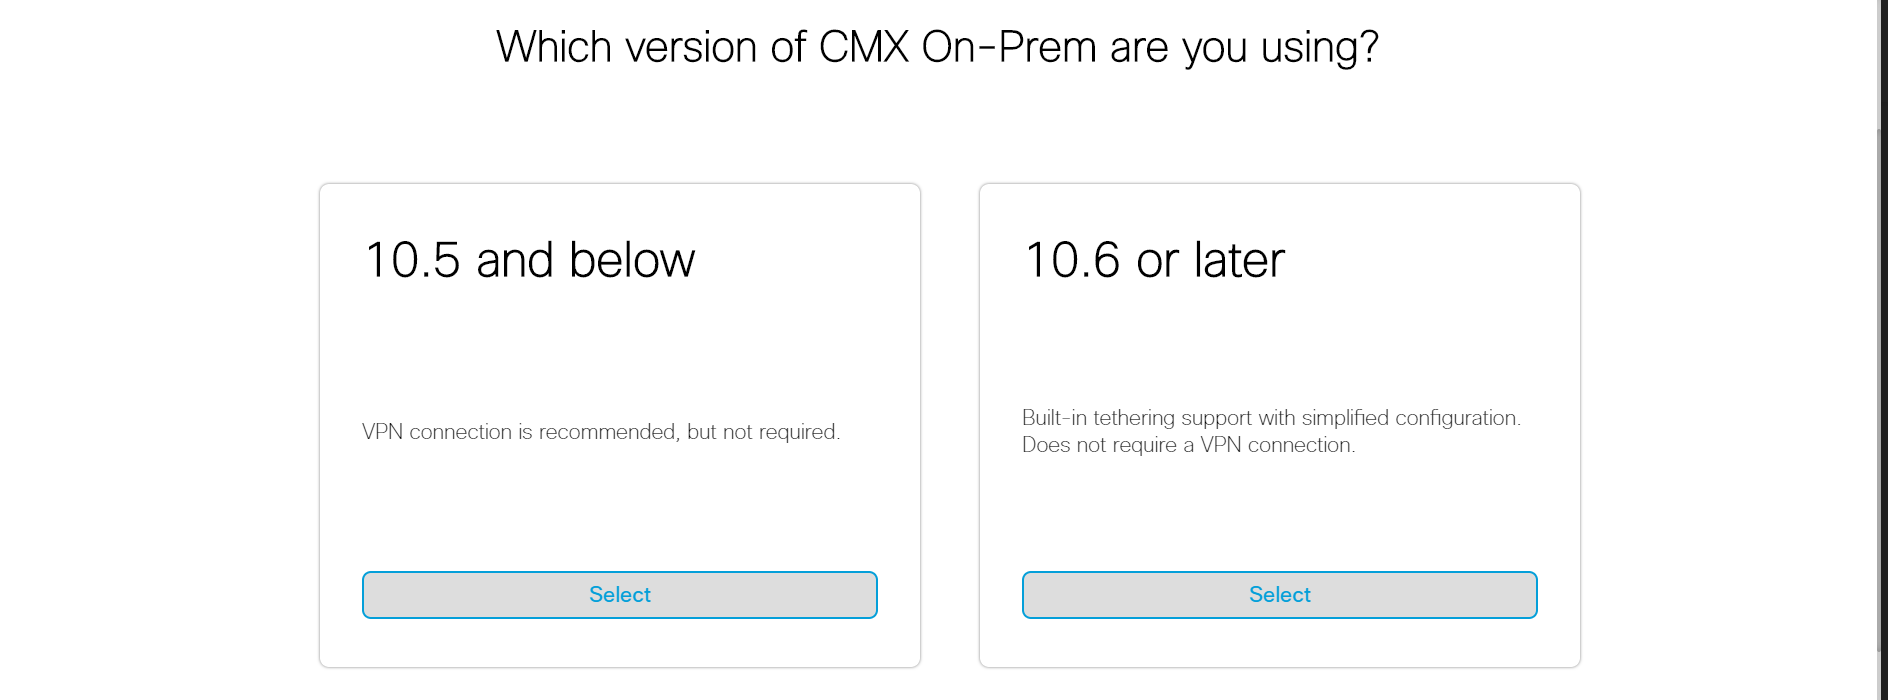
In the new “Customized Setup” Under step 2 “Configure Token in CMX”, click on “Create New Token” 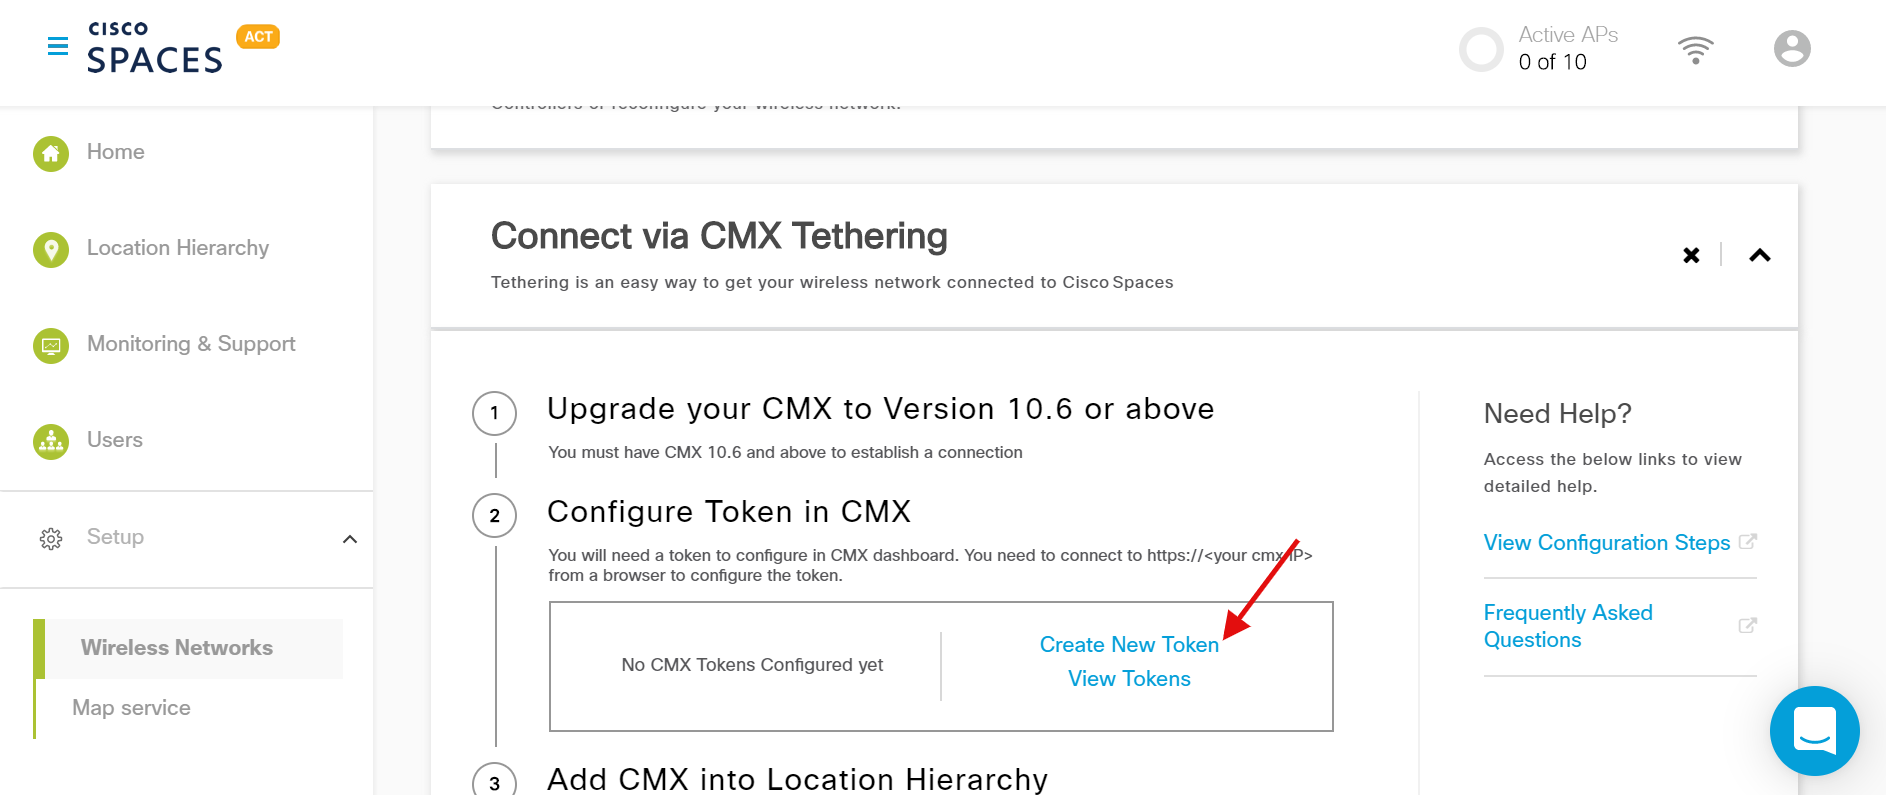
Enter the name and description of the token you would like to create and click “Save”.
In the “Customized Setup” Under step 2 “Configure Token in CMX”, click on “View Tokens”.
Mouse hover on the recently created token and click on the “Key” icon that appears. 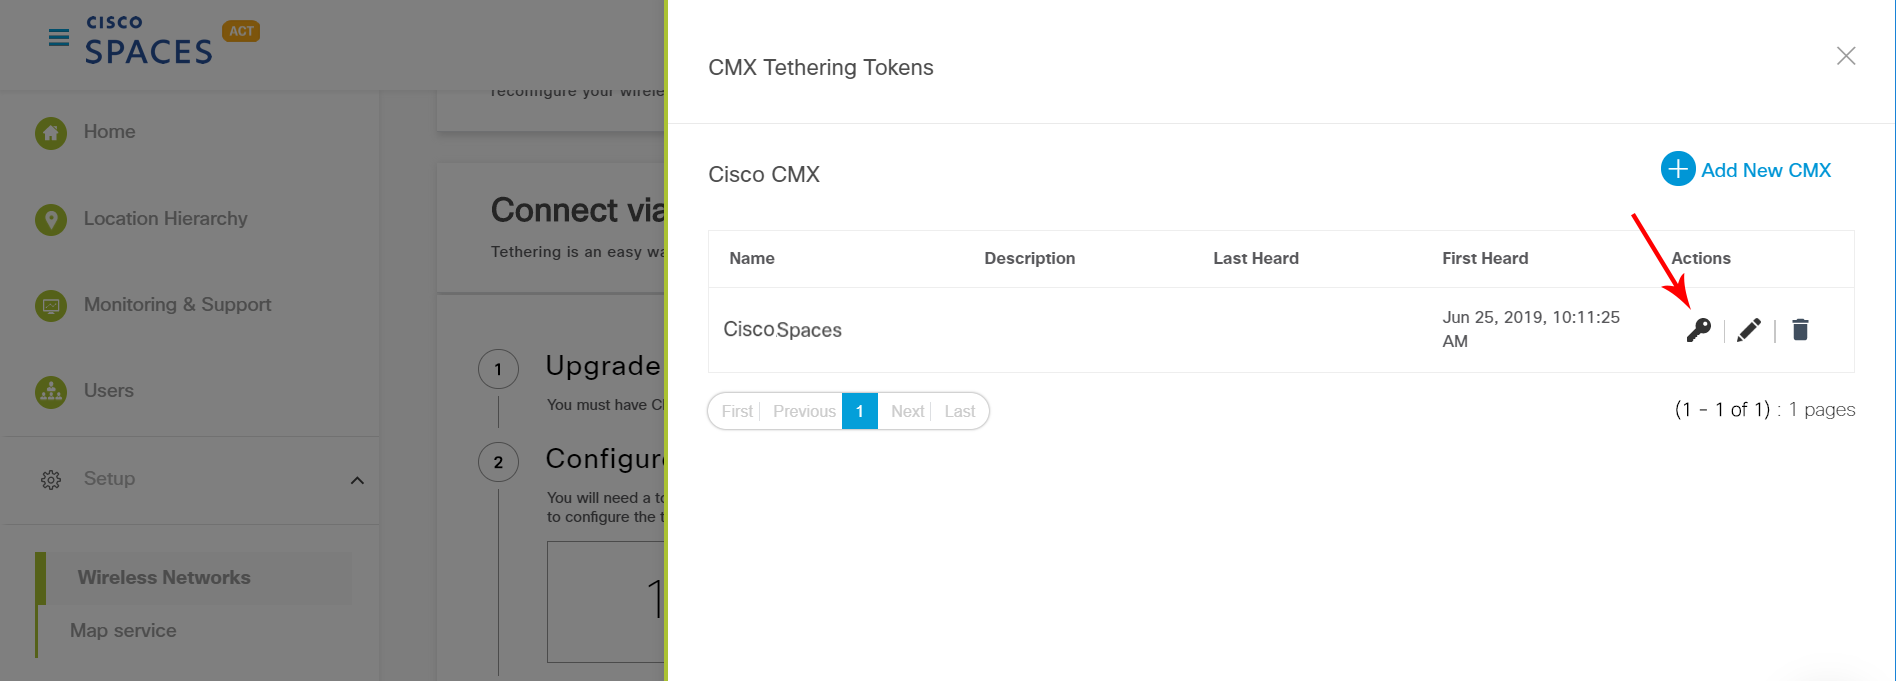
Enter your Cisco Spaces credentials to view and copy the token in the following screen.
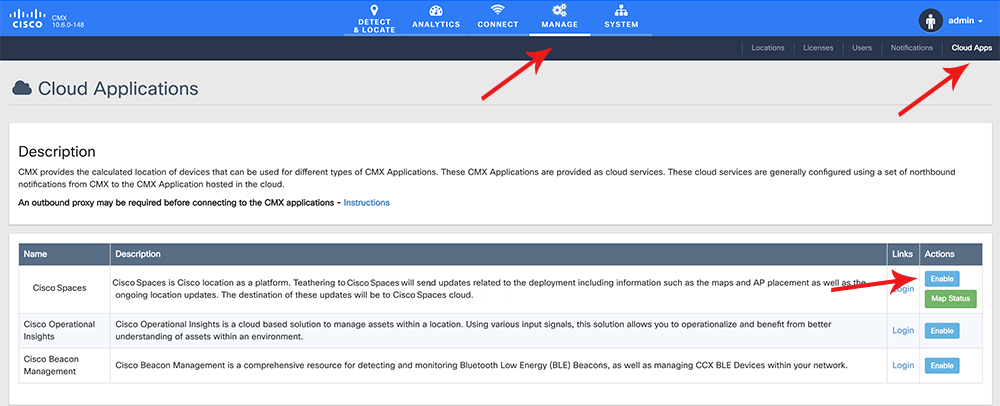
Configure Token in CMX 10.6
Return to the “Customized Setup” in Cisco Spaces dashboard. Under step 3 “Add CMX into Location Hierarchy” click on “Add CMX” 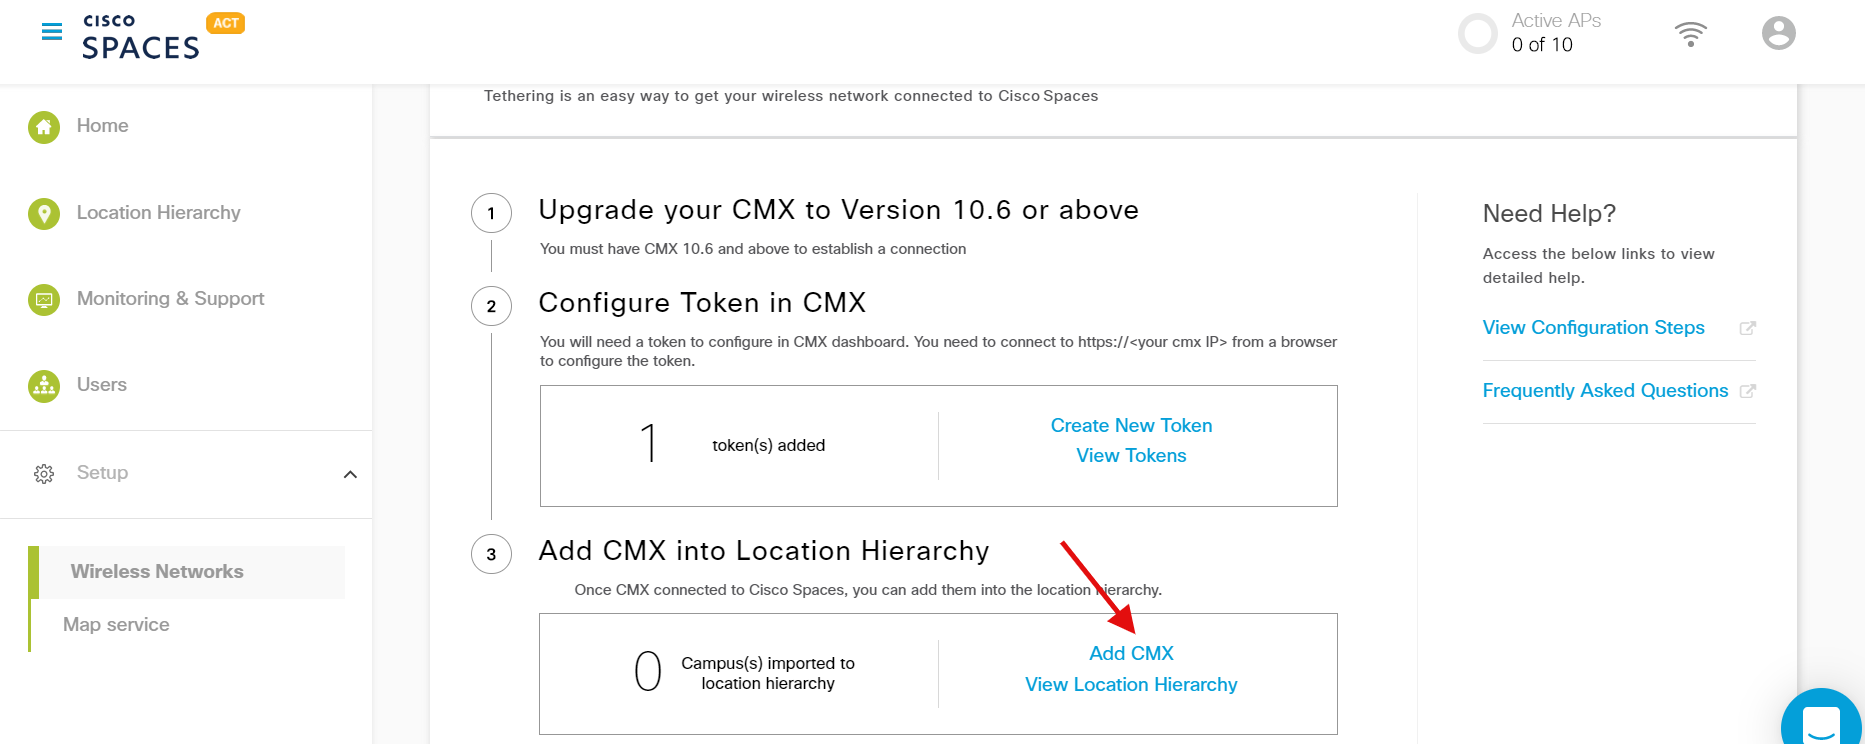
Choose the location where you want to import CMX and click “Next”. 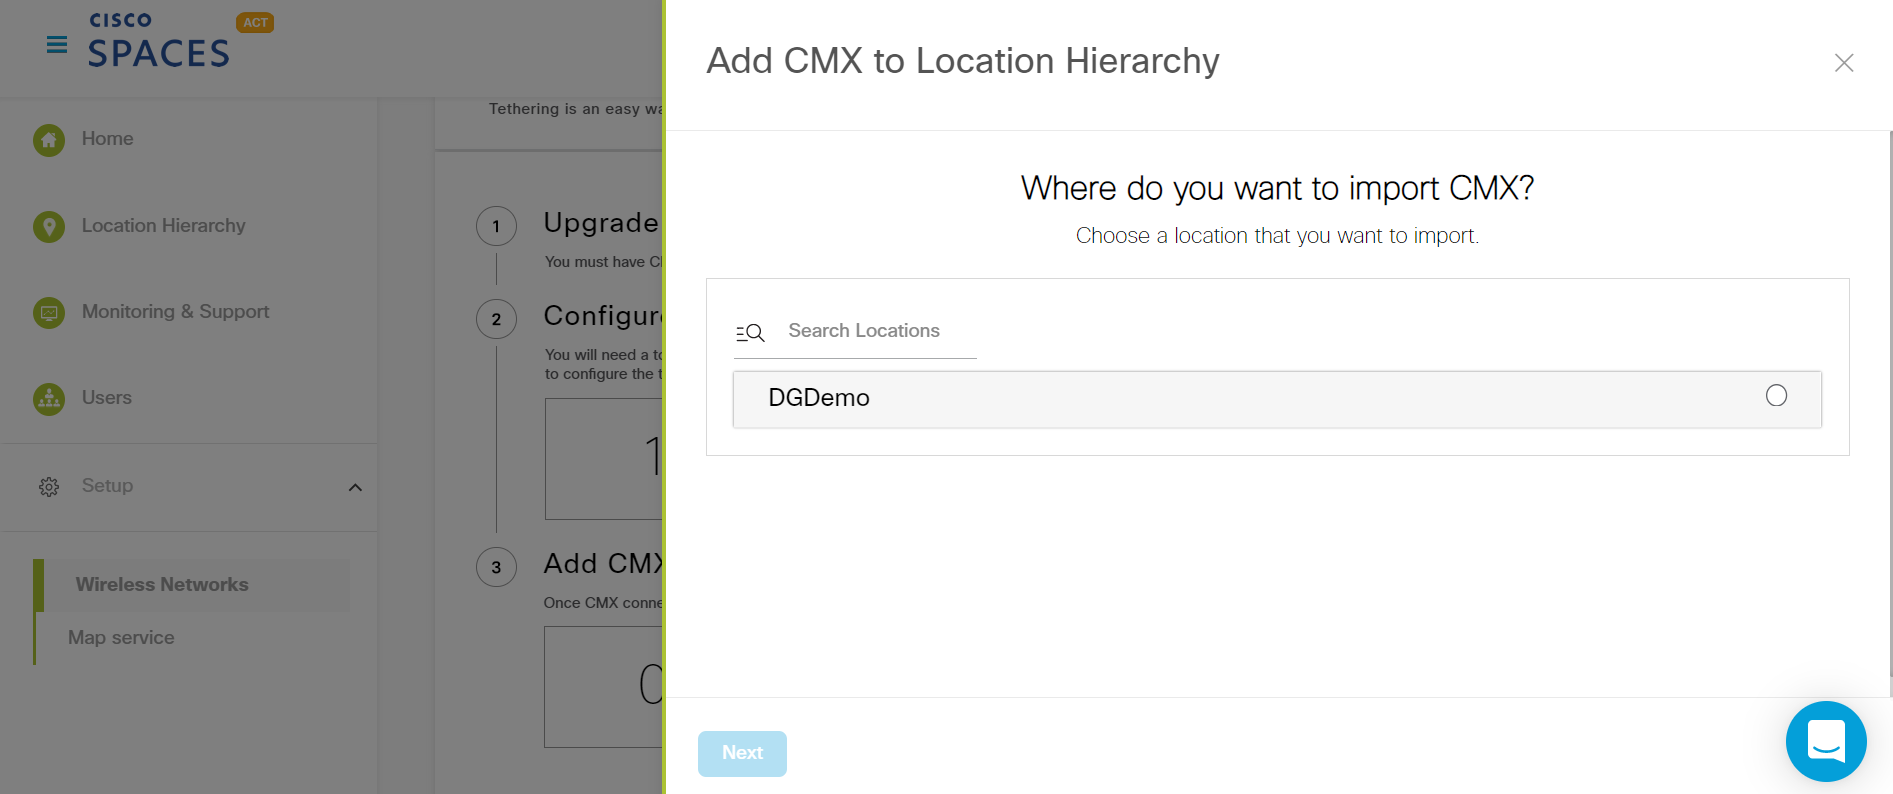
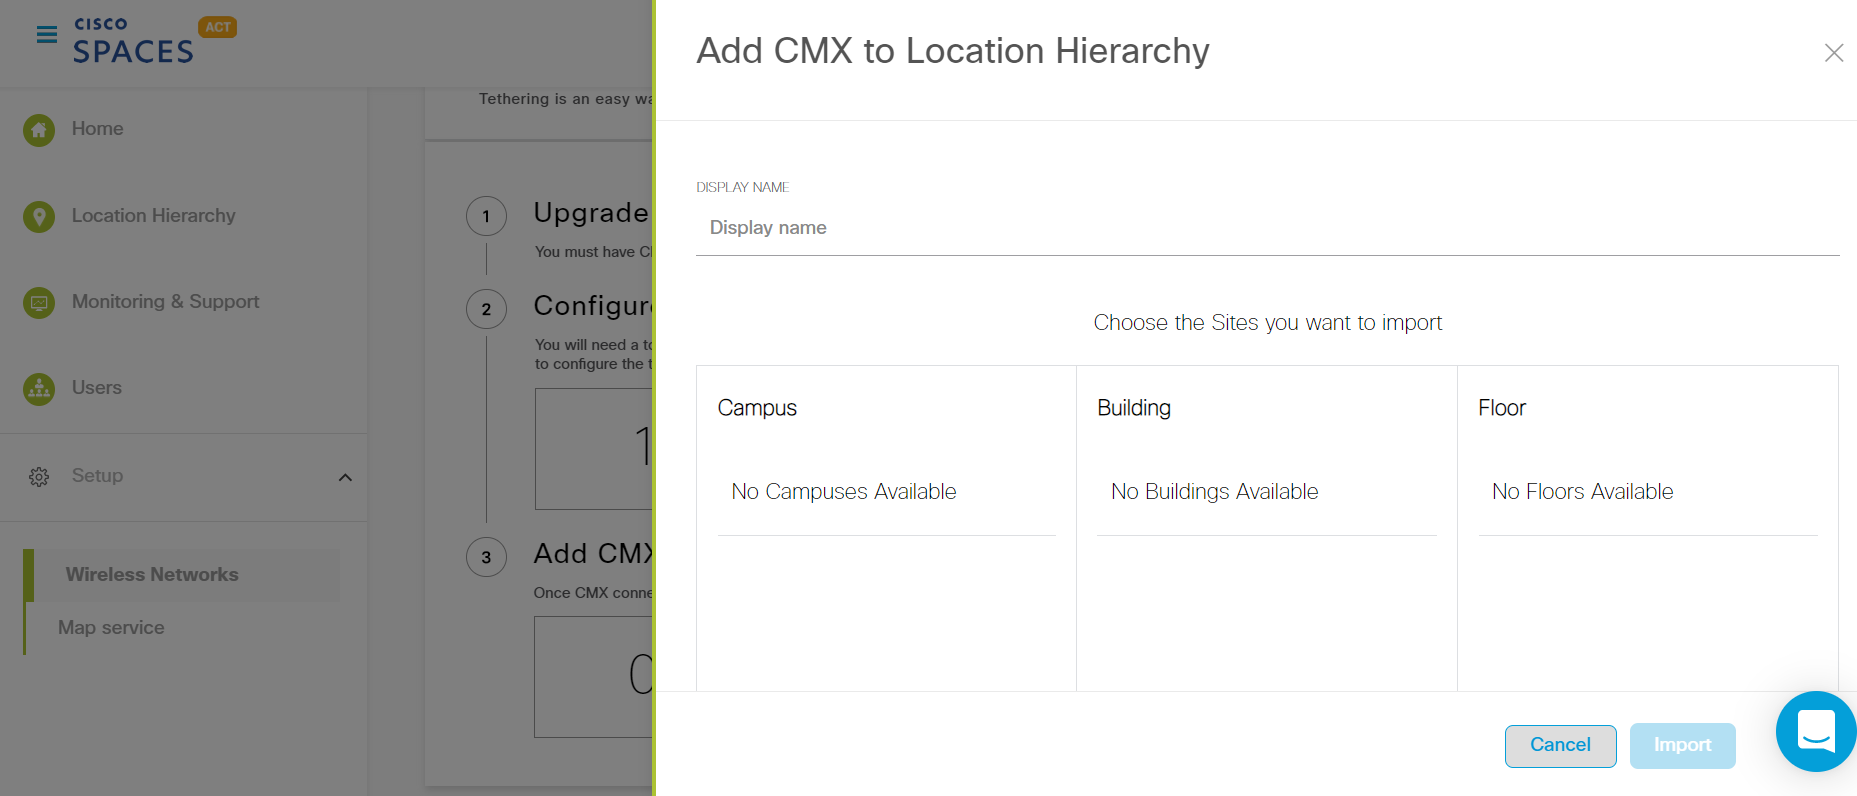
Enter a display name and choose Campus, Building and Floors you would like to import and click on “Import” button.