Spaces SDK​

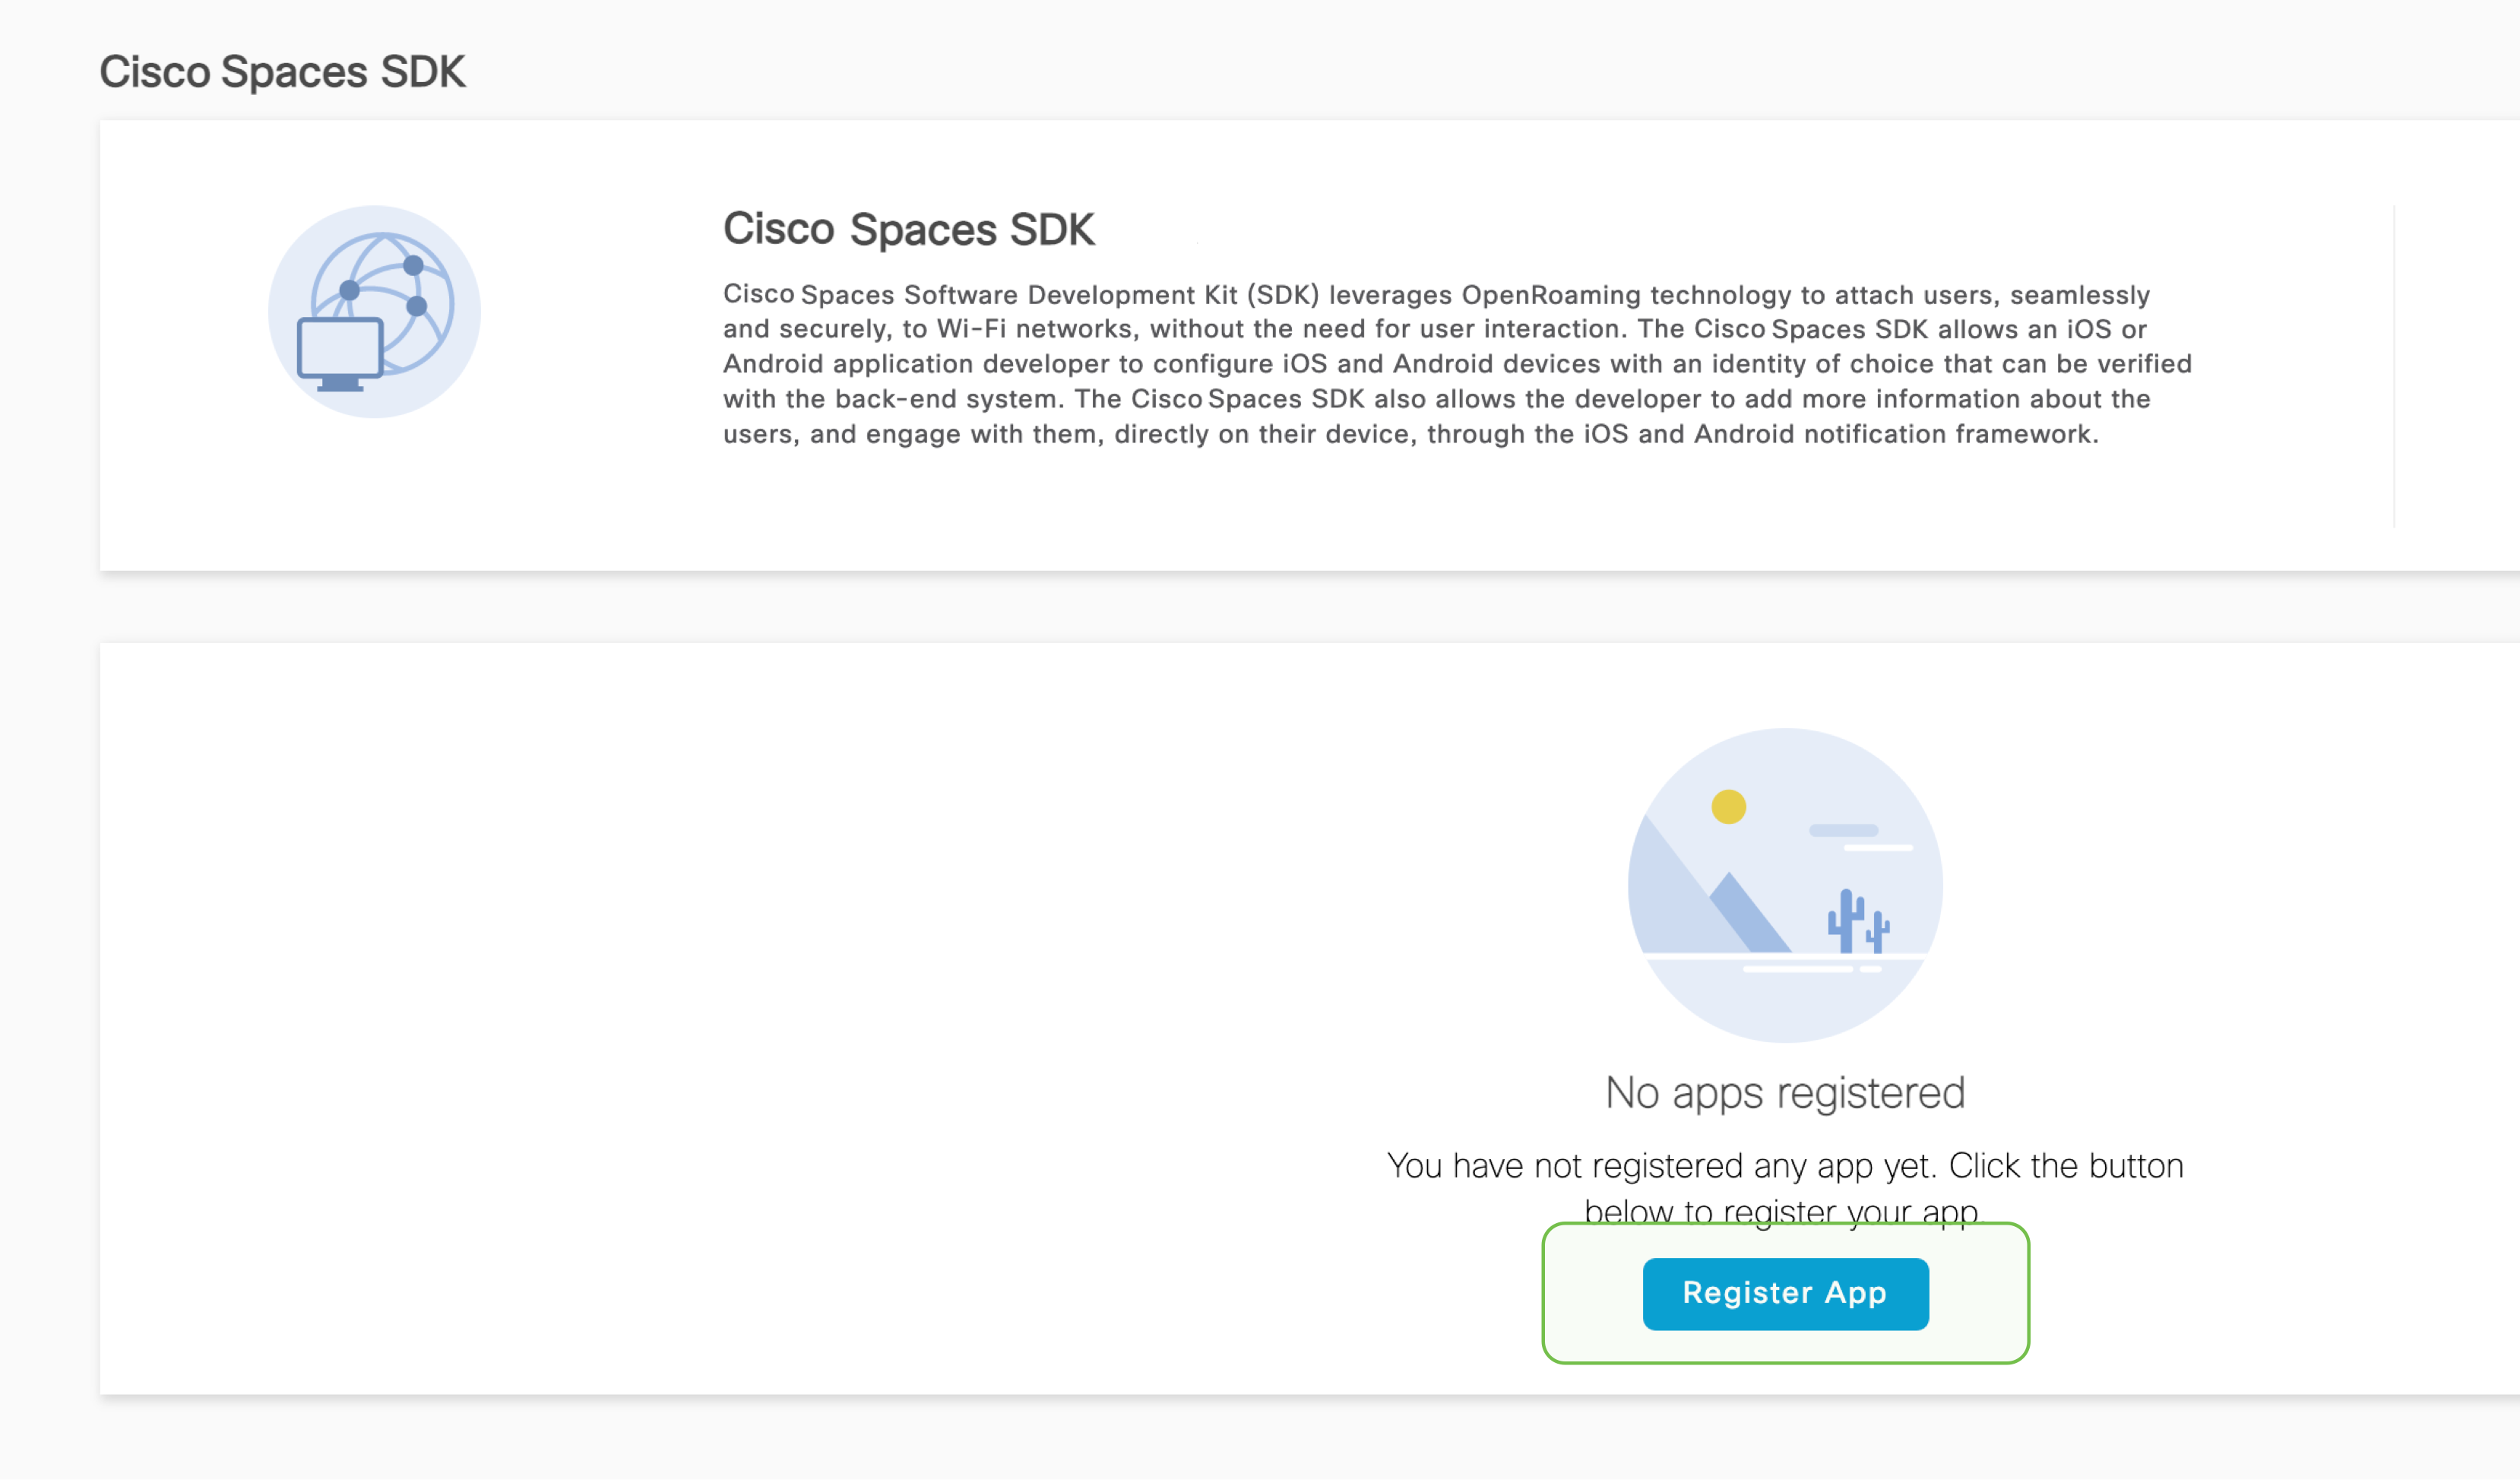
Have you ever thought about how to improve your loyalty/enterprise app users’ experience and better engage with them? Achieve these outcomes by integrating your iOS or Android app with the Spaces SDK. ​​

Auto-onboard your app’s users seamlessly and securely, to Wi-Fi networks, without the need for user interaction. Generate information and engage with them, directly on their devices, through contextual push notifications.​

Use Cases & Value

Differentiated experience for loyalty/enterprise app users​​​

Provide seamless and secure Wi-Fi onboarding to loyalty/enterprise app users, and enable differentiated services based on onboarding timing, location, etc.​

Value Delivered: Differentiated Wi-Fi experience​​

Useful to: IT, guest services and sales and marketing​ teams​

Drive contextual engagement and marketing campaigns​​

Combine identity and location data to create targeted engagements by pushing timely notifications and drive more marketing campaigns​

Value Delivered: Increased sample data for insights, enhanced by integrating identity and at-location behavior​

Useful to: IT and sales and marketing​ teams​

Drive up app downloads and at-location app usage​​

Attract more loyalty app users by offering differentiated experiences and auto Wi-Fi onboarding, and improve app users’ stickiness by increasing at-location app usage​​

Value Delivered: Improved loyalty guest experience and targeted engagement​​

Useful to: IT, guest services and sales and marketing​ teams​

Address privacy MAC challenges​​​

Identify devices and users based on the loyalty ID instead of the device MAC ID to eliminate potential impacts brought by MAC randomization​

Value Delivered: Keep all onboarding & analytics benefits without MAC randomization impact​​

Useful to: IT, guest services and sales and marketing​ teams​

Please complete the following pre-requisites before integrating Cisco Spaces SDK into your app:​

It is recommended that you create a Cisco Spaces services account for the connection to Cisco Spaces via API​

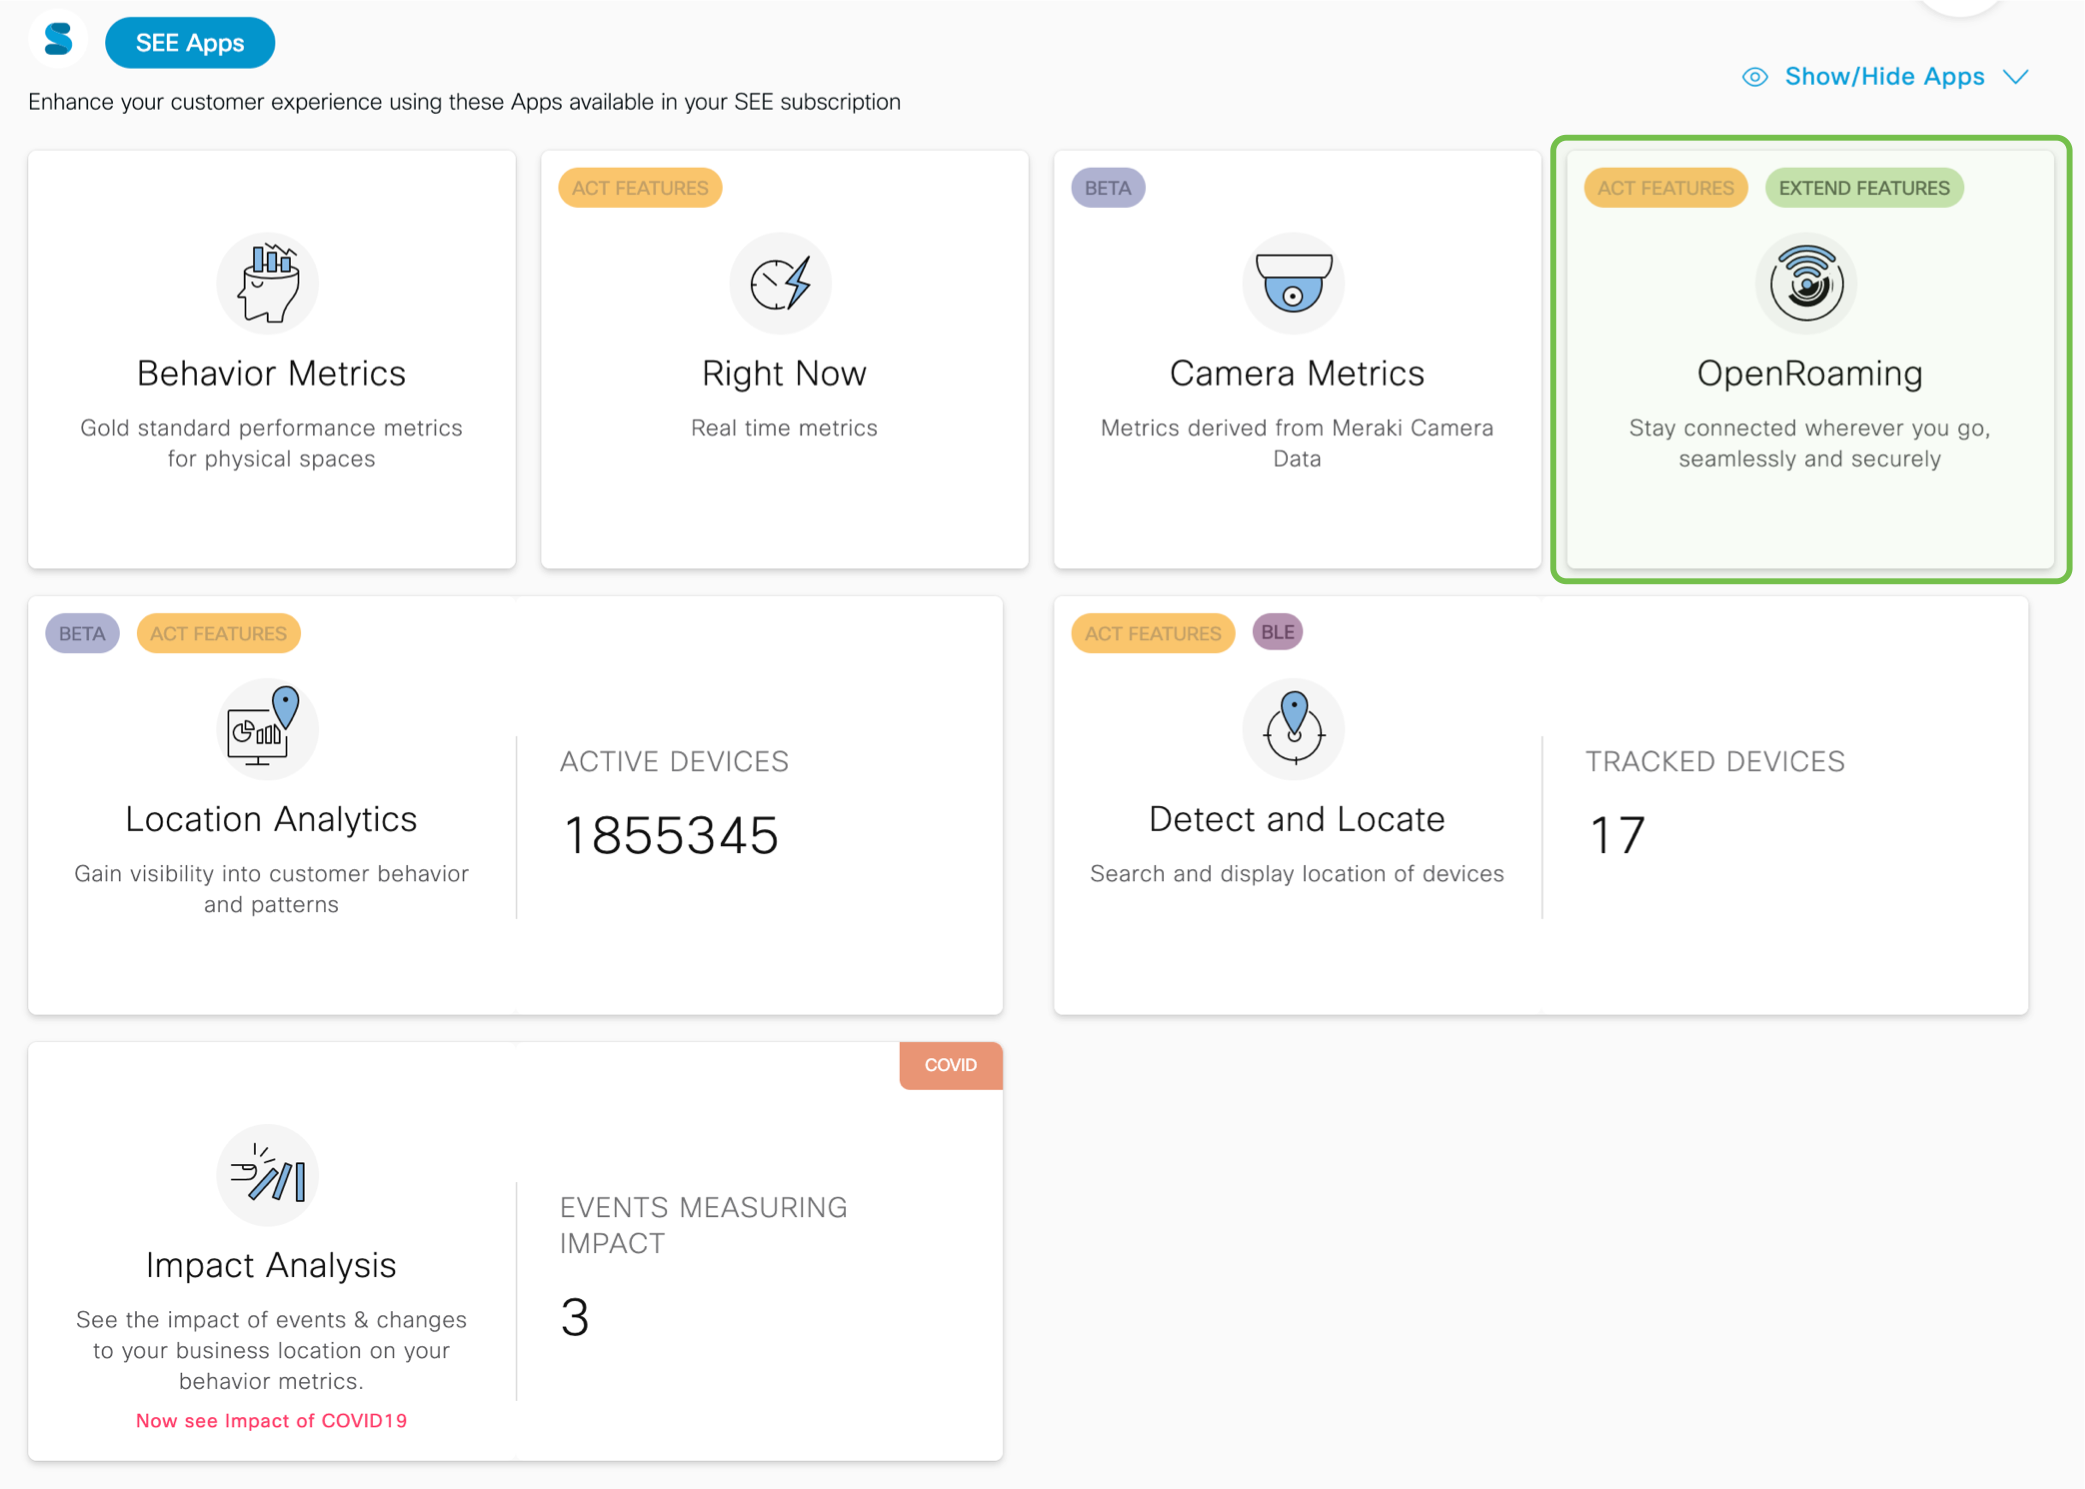
To set up OpenRoaming in Cisco Spaces, click the OpenRoaming tile on the Cisco Spaces dashboard. Start configuring OpenRoaming with the help of our Setup Guide:
https://spaces.cisco.com/setupguide/app-open-roaming/#prerequisites

To start registering, enter the ’Cisco Spaces SDK’ module. To do this, click on the Hamburger menu on the top left of the Cisco Spaces dashboard > click integrations > select Cisco Spaces SDK. This brings you to the SDK registration screen, click on the Register App button to start registering.

  • A sample app is available which implements Cisco Spaces SDK main methods. Its purpose is to demonstrate how these methods work and provide examples that developers can use to create their own applications. Check the main features of the Sample App and feel free to use the code to build your own application
    https://developer.cisco.com/docs/dna-spaces-sdk/#!sample-app/sample-app ​
  • Provision the OpenRoaming Profile (Mandatory Execution Flow) by executing the SDK methods exactly in the order shown below (this is for when the app using the SDK runs for the first time):

    • Initialization (registerSDK method): Initialization must be performed only once, before any other function is performed. https://developer.cisco.com/docs/dna-spaces-sdk/#user-guide/init​
    • User Identity Association (associateUser method): A user identity must be associated to the mobile device. The 3 options available are:​
      • Server Auth Code based
      • Webview based​
      • User ID based​
      • If identity is associated in the Server Auth Code or Webview based methods, mobile users can sign-in with Apple sign-in or Google sign-in or even your own OpenID Connect (oauthv2) Identity provider. For integration with your own OpenID Connect IDP pls email dnaspacessdk@cisco.com
    • Profile Installation (installProfile method): An OpenRoaming profile must be installed in the mobile device so that user can automatically login to a Wi-Fi network, that is part of the OpenRoaming Federation.​
  • Provision the OpenRoaming Profile (Detailed Flow): Other functionalities are also provided by the SDK, although not mandatorily. A complete list of functionalities are available here: https://developer.cisco.com/docs/dna-spaces-sdk/#!user-guide/complete-list-of-functionalities
Test plan to validate the sample app is provided here as an additional reference: https://developer.cisco.com/docs/dna-spaces-sdk/#!sample-app-test-plan/sample-app-test-plan ​​


The configuration can be done manually on the respective controllers OR the configuration provided in the Cisco Spaces Setup Page can be used.​

  1. Go to OpenRoaming app within Cisco Spaces Dashboard.​
  2. Click on the Hamburger menu and go to Setup.​
  3. Select the required Wireless LAN Controller.​
  4. Select the required OpenRoaming Hotspot profile and click Continue.​
  5. Provide the WLAN-Id based on the controller chosen.​
  6. Configuration is generated based on the input.​
  7. Copy the configuration and paste it in the CLI.​

Please take a moment to check if you’re able to successfully setup the app. Click on ‘yes’ to indicate it’s working. And on ‘Not yet’ if you need any assistance.